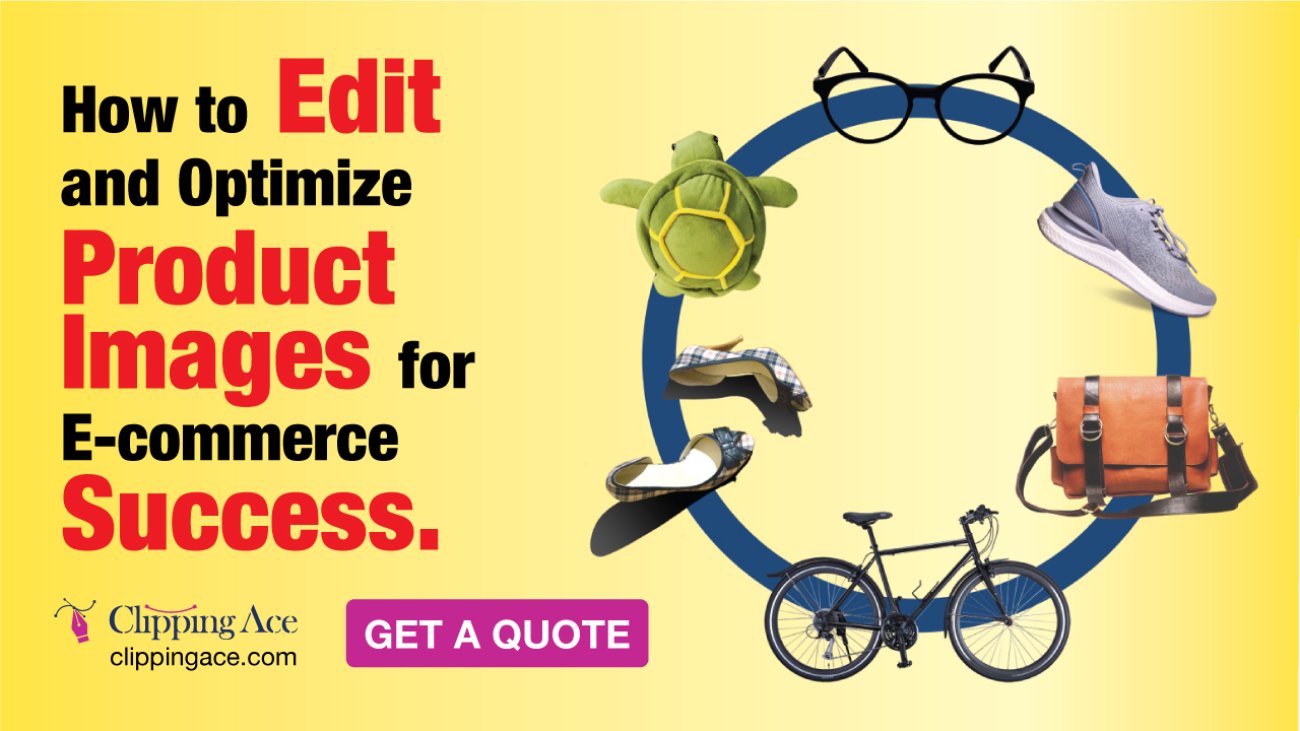
clipping path service for e-commerce

Understanding Clipping Path Services for E-Commerce Success

Introduction In the dynamic e-commerce world of today product visuals are what really sell an item. Clipping path services, a one powerful tool that has become indispensable for success in e-commerce sector. After having worked as an e-commerce expert, I can swear by the fact that clipping paths really change how product images turn out in a good way and here in this article, I will be discussing more about the same.

Why Use Clipping Paths?

Clipping paths are essential when it comes to making your e-commerce product images look clean and professional. Clipping paths allow you to cleanly and accurately select a specific area in an image, providing the foundation for generating cut-and-paste landscapes resulting in spick and span end products that leave your customers spell-bound. And I even consider that as if it is a must at least for e-commerce to perform image optimization including;;

1. Enhances product appearance: Clipping paths will ensure that your products look good against a neat and consistent background, making them visually pleasing and less distracting for the customers to concentrate on.

2. They Make Image Editing Task Simple: With the product isolated, you get a freer hand in post-processing — color balance or cast tuning, background replacement if not happy with what you had originally thought of and even compositing images with ease.

3. Improve uniformity throughout your e-commerce platformUniform, high-quality product images offer a polished and professional brand image that will put forward into increased customer trust and conversions.

Clipping Path vs. Background Removal

Even though clipping paths and background removal do the same practical job, they are two different techniques with a range of uses. Clipping paths create an accurate, vector-based line around objects in the image to save minute edges and details. On the other hand, background removal is done using a pixel-based method to remove or substitute the background and thus may have lower accuracy with crispness around edges of the subject.

Ultimately, whether you choose clipping paths vs background removal will come down to the requirements of your e-commerce products and your image quality expectations. Clipping paths work best for any product that has a shape, detail, or transparency as they allow you to cut with better precision which means a less epic final image.

Types of Clipping Paths

There are different types of clipping paths that can be utilized for varying needs:

1. Single-layer Clipping Path: Is a basic level of clipping path, in where a single, closed vector path is drawn around the image object trimming edge.

2. Multi-layer Clipping Path: This complex clipping path technique is used to create several clipping paths for different elements on a single image, giving more flexibility in image editing and compositing.

3. Deep Etching Clipping Path: Also sometimes referred to as image masking, this technique involves a meticulous and precise clipping path that traces over the edges of your subject even in fine details or more complex shapes.

4. Neck Joint Clipping Path: These types of clipping paths are generally used in images that contain people or models, and here the path is made to meticulously separate the head of subject from the background/neck/clothing.

Of course, your choice of clipping path type will come down to how intricate your product photography is and what are the specific needs for your e-commerce.

Benefits of Clipping Path Services

If a person invests in professional clipping path services, they can avail the several benefits for that e-commerce businesses.

1. This way you have visually better product images and some say that the way how you present your products is half of getting more sales.

2. Conversion Rates: By providing high-quality e-commerce imaging products with a clear background and precision clipping path, this has helped us increase customer trust. Consequently they get more conversions.

3. Image post-processing — Since the product is on a plain background, it can be easily isolated and edited in an image editing tool quickly to color correct or compose images for creative imagery.

4. Brand Consistency: Keeping a consistent, polished feel of your e-commerce channels plays a massive role in how your customers perceive you and got them coming back for repeat purchases.

5. They cut your turnaround times and, subsequently, save you money: outsourcing the clipping path services means you’ll have more time for other key elements of your e-commerce business.

Choosing the Right Clipping Path Service

There are a few things to ponder over when in the process of hiring a clipping path service provider:

1. Quality of Work — Find a service with a stellar history of successful, accurate clipping paths that match your precise demands.

2. Manner of Timeline: That can help website owners to be aware of enough time in which the vendor leads them to make sure timely shipping and delivery that is crucial for on-time product image updates.

3. Scalability: As your e-commerce business grows, pick a provider to be able to deal at the volume and complexity of your product images.

4. Customer support : Evaluate the provider on how promptly and efficiently they can handle any problems with their services.

5. Price Comparison: You can compare between the prices of different providers to go with the service that is most suitable for you budget wise.

Our best clipping path services, help you to level up your e-commerce product images and take it as seriously as we do. We will help you with high-quality results and make sure the online marketplace gets rid of well. Get in touch today to find out how we can transform your product images for the benefit of your e-commerce success.

Conclusion

Your product photos play a significant role in how successful you will be in the fast-paced environment of e-commerce as they can greatly affect how well your potential buyers become customers. It is very essential to make your products high-quality images that look clean, professional and eye-catchy, as not all the apps are able to deliver you this quality of image so clipping path services come into play in order to optimize a product or image on an e-commerce store.

Clipping path – what it is, different types to consider and important factors to look for while choosing a vendor that will take the power of your product images to greater heights and pushes the e-commerce business into new dimensions. By using professional quality clipping path services your customers will connect more readily with the products you are offering which means a significant uptick in sales and an increase to brand recognition.

Product image background removal

How to Remove Product Backgrounds Efficiently

AI in background removal

In e-commerce and online marketing, high quality product images are the attention that converts to sales. But if done manually for the product images that you have, may take a toll in terms of time & effort to invest – make this harder when you are dealing with bulk products. And this is where the power of artificial intelligence (AI) kicks in.

The AI enabled tools that remove the background have been a gamechanger for how businesses edit product images today. Especially thanks to high-tech, algorithm, and machine learning use in the background removal tools that have made it easier for even beginners are now able to do professional level product images within a few clicks saving time and resources. In this blog, we will look into the use of AI for background removal and list down some popular AI tools that can get the job done, as well as a step by step guide to help you remove product backgrounds quickly.

Popular AI Tools for Background Removal

When it comes to AI-powered background removal tools, there are several options available in the market. Here are some of the most popular and effective tools:

A. Canva Background Remover: Canva, This one is a design platform used widely and also includes an AI-powered background removal feature. This tool helps you easily and instantly create great,professional-looking product photos for your business as a small or individual user.

B. Adobe Photoshop Background Remover: Adobe Photoshop – the popular and powerful image editor, comes with an AI feature called “Select Subject.” Mask AI automatically detects the subject in an image, so that removing the background is a breeze.

C. removal.ai: Removal.ai Final Word — removebg from imgd.ai_helper is a dedicated AI-powered background removal tool usereasy(weavable) interfacesimple, good accuracy It causes many sorts of file formats and can process both simple and complex backgrounds.

D. Clipping Magic: Clipping Magic(https://clippingmagic.com/)Clipping Magic is yet another leading AI-based background removal tool that ensures a smooth and quick process of removing the background. It provides a variety of advanced options, the best ones being Threshold Precision and Shadow Removal.

E. Pixelz Background Remover: The new breed of background removal solutions Pixelz is a commercial grade, AI-driven background removal service offering top-tier quality results. This is most helpful for businesses that have an extensive catalog of products and must process multiple images at one time.

Step-by-Step Guide: Removing Product Backgrounds

So, now that we have discovered some of the best AI background removing software on the web, let’s get straight to cutting product backgrounds with these simple tools step by step.

1. Opt for the best onePick the right tool: Choose an AI-based background removal tool according to your need and product image complexity. Think what is important to you — ie: it could be usability, accuracy, smooth workflow (charts), and because those are your goals.

2. Get Your Images Ready: Naturally, before uploading images of your products on a thresholding tool to remove background from photo effects, you need to make sure that they have good lighting and are high quality. This will assist in the correct detection and removal of background by AI algorithm.

3. Step 4 : You can either upload your products and process them personally or based on the tool you are using, it will provide instructions to guide you through uploading your product images. Step 5: Pick a suitable category for each image. While you can perform the selection manually, most AI-powered background removal tools will detect and remove the background automatically.

4. Reviewed and Polished Result: After removing the background up to here, double check if the background is successfully deleted. By the same method, advanced editing tools allow you to fine-tune your image (such as adjusting edge precision or remove shadows) to ensure that what appears in the photograph is what you intended.

5. Export and Optimize the Images : When you are happy with removing background, then export images to your prefer format such as JPG or PNG. Do image compression without losing quality for web and mobile sizes.

6. How you can use product imagesOptimize Images For Your E-Commerce Integration: Incorporate the optimized product photos into your e-commerce platform, website or other offline promotions to display your items perfectly.

Additional Background Removal Apps

While the ai powered tools are efficient, some of other background removal app also deservers your attention. Some other choices for you:

Photomosh: Photomosh is an AI based web tool that can also be used to remove backgrounds from images. In addition, it provides a user-friendly interface which is why if you are not from a technical background, you should consider it.

Slazzer : With Slazzer, you can remove images in just seconds integrating it with your existing applications or workflows. It provides advanced capabilities such as multi-object segmentation, edge refinement, etc.

· rembg: The rembg python library is an open-sourced NiB algorithm that can be used to remove image backgrounds using a line of code. This might be the biggest option for developers wanting to power these type of solutions through a custom background removal model.

Depositphotos Cutout: A popular stock image platform that provides a specialized background removal service called Cutout An AI-based service for dropping image background, good at it with high precision.

Conclusion: Best AI Tools for Background Removal

Having high-quality product images with transparent backgrounds are key to success in today’s competitive e-commerce world Related: AI-powered background removal service for an efficient image editing solution that improves your product visuals

There you go, these are some of the best AI-enabled background removal tools functioning out there along with their different characteristics and qualities. You should look at accuracy, ease of use, integration with your workflow and price when picking the right tool for what you are looking for.

If you need more high-end features for your product images, leverage the AI-based background removal tools as talked about in this write-up. This will enable you to work on other areas of your business while automating the background removal process, and have a more consistent visual branding for your customers.

Use the magic of AI and try removing product backgrounds today!

e-commerce photo editing services

How to Edit and Optimize Product Images for E-commerce Success

An Introduction to The Significance of Product Photography in E-commerce

I have been running my e-commerce business for more than a decade and I understand the importance of product photography in words how not only a good sales but also sustainably growing businesses in today’s highly competitive markets. Since customers cannot try goods before purchasing online, as they would in a physical store, owning nice high-quality pictures is the best if not only professional way to display your product offering on web and invite buyer interest.

A poorly-photographed product can mean the difference between a clicking back to shop with their favourite brand or going elsewhere. Dark, out-of-focus or unattractive images can greatly damage your e-commerce campaign and it would cost you sales.

This is why product image editing and optimization is so crucial for every e-commerce business striving to succeed. With the right techniques and tools in hand, you can turn mundane product shots into super visually appealing attention snaps that not only impress your audience but promote sales too.

How to Edit E-commerce Photos for Maximum Impact

This is the real beauty of your product images edit. It is at this stage where you can improve visual presentation, increase visibility on the main points and most importantly make sure that any design changes are spread out evenly, making your e-commerce catalog look like a profesionally designed online store.

So these are the basic steps I follow on how to edit my e-commerce photos(Result Oriented)

1. LightingChanges in Lighting:For a perfect product photograph, the proper lighting is very important. I adjust the brightness, contrast and exposure via editing software in my images so to provide a clear vision of products and its detail.

2. Correct Color Correction:Accurate color representation is crucial to the e-commerce business. I meticulously tweak the color balance, saturation and vibrancy of my photos to try to ensure that what you are seeing is what these products actually look like.

3. Remove Background: Clear and non-distracting backgrounds help the product stand out. I can professionally cut out the background using masking techniques and layer manipulation, achieving a studio-quality appearance.

4. Cropping and Resizing: Correct cropping or resizing provides consistent e-commerce framing. I am very specific in terms of cropping my photos featiring only parts of the product and resizing to meet all dimensions required by different platforms/devices.

5. Retouching and Cleanup (To remove small imperfection, blemishes or any other thing that makes products visually unattractive. I re-touch the whole section of my picture delicacies so that they are squeaky clean and as perfect looking awesome.

6. Consistency and Brand Identity- For my product images, I like to keep all of them in the same style, color scheme and overall look for branding purposes. This ensures a cohesive ecommerce experience for my customers.

These are the editing steps I use to turn regular product shots into visually stunning, attention-grabbing assets that wow my audience and drive conversions.

Choosing the Best Image Format for E-commerce

How you format your e-commerce product images can make the difference between better quality output, smaller file sizes, and improved performance on your site. Factors to consider when choosing the right image format

1. JPEG (Joint Photographic Experts Group): This is a very common format that provides a nice compromise between image quality and file size. And while product images with intricate color schemes and gradients may not see the full benefits, this is still a very good overall option for squeezing that file size without sacrificing too much in terms of visual quality.

2. Portable Network Graphics (PNG): A lossless format good for product images and anything else that needs to be of high quality. PNG files typically have larger file sizes though, making them load slower on websites.

3. WebP: A newer image format is developed by Google, which can deliver high quality images with the superior compression than JPEG and PNG. Nowadays, it is common to use WebP files to save a tiny bit of space and reduce the overall loading time — which can be important for e-commerce sites.

4. SVG (Scalable Vector Graphics): Best for Product Images like Icons, Logos with Simple Shapes. SVG: SVG is a scalable vector format that doesn’t degrade in quality and a perfect way for high resolution displays and responsive designs.

When selecting the ideal format for your e-commerce product images, I take into account variables as how complex the image is, whether it needs to be transparent or not, limitations on file size along with my own e-commerce platforms requirements and target demographic. I can use the correct format to create attractive, fast-loading product images that provide a great user experience for my customers.

Hiring Professional Photo Editors for E-commerce

I may know some rudimentary photo editing, but I realize certain jobs and skills are beyond my facility. Therefore, the use of a professional photo editing service could be really helpful for my online business in many ways:

1. High Quality Images: A professional image editors have both the experience and tools needed to bring my product photos up a notch. They can care for the visuals, pick through and improve them, so that my products look their absolute best.

2. Saves time: It is long, boring and repetitive work when you have thousands of images to croppreferred size. For me, using a professional outsourcing this task saves my time and allows me to focus on other e-commerce sides.

3. Considering my style: Quality photo editing services ensure the stylistic suspense of all my product images for maintaining a consistent branding. They can keep in mind to edit a certain way, use indicator colors and follow the aesthetics so it conveys my brand visually.

4. Provider for E-commerce: Professional Image editors will provide all the essential requirements and standards of high-quality photos in regards to e-commerce products. They can optimize my images for every kind of screen, device and page load speed etc ( to showcase my products effectively).

5. The cost-effective- Although a photo editing service may require an initial investment, it can return benefits in the form of engagement with customers and increase sales, not to mention the hours saved by avoiding these processes internally.

It can ultimately, help me become more successful in the world of e-commerce; all thanks to a specialized photo editing service that partners with businesses such as mine every day.

Photography Tips for E-commerce Websites

I edit and enhance my product images and capture the well-quality visually appealing product photographs. So, I am going to share with you some of the best photography tips that guarantee my e-commerce images pop!

1. Unified Lighting: It’s important to provide clean images that have a uniform level of lighting for a consistent, professional-looking e-commerce collection. To maintain a higher standard of product images, I have started to shoot product images using both natural and artificial light so they get an overall clean, studio look.

2. Correct Angles/Perspective: I think carefully about the exact angles/perspectives from which to shoot my products, making sure that the most important aspects of them are seen. It entail shooting from several angles, tight close up and creative composition.

3. Plain Backgrounds: An uncluttered, plain background makes sure the product remains the focus of the image. I Simply photograph against a solid-colored background or seamless white paper to achieve my clean, professional look.

4. Act on Details: Texture and patterns are big things for me when it comes to my work.punched faces, hand stitched with the front sides and edges that totally match up according to the pattern; close uprientation of intricate features that would be seen. For all this information, I can offer a more in-depth and attractive visual representation of the item when I capture these details too.

5. I take lifestyle and context pictures aside from the basic product shots which display your product in action or can give a relatable setting. These images are helpful to give a context of how the product would fit in their lives.

6. Consistency and Branding – For me, this is about having all my product shots look like part of the same family with a consistent style, colour scheme whatever throughout. This ensures that my e-commerce experience looks visually congruent to users.

These are some of the best practices in photography that I have learned, and through these methods I have been able to take great looking product pictures such as those above where they managed to interesting my customers in my products/ services with all features & benefits available, thus the more you sell your e-commerce business / online store.

Conclusion: Professional Editing for Successful E-commerce Businesses

Your product photographs have the power to make or break your success in the fast-paced world of e-commerce. This is where product image editing and optimization comes into play; skill yourself in the art of creating captivating asset images from dull looking, regular catalog-style product shots, that enthrall your viewers and convert them.

The editing phase is where most of the magic happens, from generalizing the lighting and color correction to intricate work involving background removal and retouching. Partnering with a professional photo editing service will help you achieve high quality e-commerce images that is on brand, and user-friendly for your site visitors.

After all, while high-quality product photography comes with a price tag, it’s less of an expense and much more of an investment if it means long-term success for your business in the e-commerce marketplace. When you focus on your product photography and image optimization, you can stand out among the competition, create a sense of trust with your customers, and in turn, increase sales for your online store.

If you think your e-commerce product images can be improved to give you a stronger sales edge, then outsource to our photo editing service today. When a top-of-the-funnel searcher is trying to understand their options, the last thing you want is for them to leave your site without seeing how good your products look. Reach out to us now and discover our services that can make you supercharged in e-commerce journey.

neck joint editing for clothing manufacturers

Neck Joint Editing for Clothing

Introduction to Photo Neck Joint Services

To pay attention to the detail in clothing manufacturing and fashion industry is of importance. Because literally every part of what makes a piece of clothing, from fabric to stitches, is vital in making an item look finished and chic. But there are challenges that even the most beautifully produced garments face when it comes to photography and digital marketing. Here come the neck joint editing services which provides an essence for apparel manufacturers to impress their product images and brand reputation everything from one place.

neck joint editing for clothing manufacturers

What is Neck Joint Service?

Neck joint service which is also known as neck joint editing or ghost mannequin effect, is a significant photo editing technique to remove the visible joints or gaps from either model’s neck or apparels that they have worn. The process gives that seamless polished appearance akin to an image of a floating garment, or appropriately fitted mannequin. Instead of taking away from the garment, these distractions are removed and focus is placed on the design itself — showing off its construction, texture, details and shape.

Benefits for Clothing Manufacturers

So, there are lots of advantages as a clothing manufacturer you can head to in doing the neck joint services. Here are some key advantages:

Improved Look and Feel: The neck joint process will remove the subject’s or the mannequin’s body in the photograph to make it look like a floating piece of apparel with an empty space for proper visualization.

Brand Consistency: Using this solution with neck joint retouching, your brand looks professional and consistent across the board in its product imagery.

Better customer perception: great photos can improve the perception of your clothes and increase its value, which may result in better conversion ratessetVisibility.

Competitive Edge : In the competitive world of fashion, neck joint editing may give you an upper hand by presenting your products in the most favorable way to differentiate yourself from competitors who are not taking advantage of these services.

Faster workflow Outsourcing neck joint editing to experts will not only make your workflow easier, but it will also save your time and allows you do other important work in your business such as designing, production and marketing.

The Process of Neck Joint Editing

Forging neck joint editing is a very meticulous process and more so now that it is kind of an art and old programs may no longer serve the purpose. This gives a broad idea of the process that is involved:

Image Preparation – In this initial stage, the product images are received and are edited by meeting the requirements for Neck-Joint Editing People like to become a part of something that makes them look attractive and neck joint service will help with clothes. Often, this means tweaking lighting, color balance and so forth.

Masking and Selection: The editor masks around the model’s neck, while selecting her garment with specialized tools and techniques that produce a clear delineation between these two areas.

Blending and Retouch: Post selecting, the editor blends and retouches those transition edges seamlessly and as natural as possible from the neck of the model into the piece of clothing.

Final Touches: In the last stage, you will have to make sure that the image to be edited has any last-minute adjustments such as position, color correction technique insertion and snappy finishes.

Applications in E-commerce and Marketing

In contemporary times, the neck joint editing services are more demanded than ever before by cloth-manufacturers especially those related with e-commerce and marketing. Some of the key applications are:

E-commerce Product Photography: High-quality product images that look good and which help sell the products. When you head joint editing must be to create terrific photographs which help your wearable and meaningful designs appealing enough that it will bring good conversion or the user response.

Digital catalogs and lookbooks: These are marketing tools for clothing brands; online catalog and lookbook help the customer visualize apparel. Implementing neck joint edited images will help you provide a seamless and high-quality visual experience that reflects your brand and products in the right manner.

Social Media and Influencer Marketing: The social media platforms along with the influencer marketing has played a key role in shaping the clothing brands to encounter the expectations of their target audience and have been made power-packed tools. Neck joint edited images can result in appealing visuals that just pop up on the social media feed deceasing being lost in the crowd ultimately which leads to good engagement and popularity.

Advertising and Promotional Materials: Whether it be advertisements in print or digital, billboards, parts of promotional items as well -neck joint images can give that extra oomph to your marketing campaigns sending a message about how your products look like quickly.

Choosing the Right Neck Joint Service Provider

Neck joint service providers as the need for neck joint editing services kept growing, all the providers were born. Of course, that means the same service provider should have some way of proving the quality and experience they offer to ensure a high standard outcome for you with your seamless application process. Factors to consider when choosing a neck joint service provider

Porfolio and Experience : Check is the graphic design service provider experienced with neck joint editing for clothing manufacturers. Facebook examples of their work Examine samples of previous click-to-Messenger campaigns to see the potential outcome.

TAT – This is important because it tells the customer how long it will take for their projects to be completed and that can affect there workflow and on-time deadlines.

Pricing and Value: Compare pricing structures, making sure that the service provider has more competitive rates and also delivers results with great quality.

Communication and Customer Support  – The communication process must be effective, and customer support must always be responsive. With this, you need to find a service provider that communicates effectively and is always available to answer any questions or concerns.

Scalability and Modularity: Determine whether the service provider will be able to scale their services as you grow and can manage projects of different nature, size, and complexity.

Conclusion

Neck joint editing services have proven to be indispensable for improving product imagery and overall brand appeal, especially in the visually focused competitive world of fashion and apparel manufacturing. These professional level of service can be invested in creating beautiful, razor-sharp graphics that cannot fail to catch your future customers eye, increase the perceived value and help you increase income.

Owing to the competitiveness in the clothing manufacturing industry, maintaining clarity and refining brands’ visual image is pivotal; hence our professional neck joint editing service. We combine the expertise of our skilled editors with cutting edge technology to render your product imagery in flawless, pixel perfect detail – showing off your products in their most desirable light. Please feel free to reach out if you would like more information on what we can do for your brand’s visual identity.

777

How to Become a Successful Nail Technician and Make Six Figures

How Long It Takes To Become A Nail TechnicianBecoming a nail technician is a career that can come with many rewards, and it holds the potential for you to earn big.salaryayscale.comBeing fastened to a desk job doesn’t seem appealing enough for you? The Ultimate Guide to Becoming a Professional Nail Artist in SA and Earning Up-to 6-Figure Monthly! This advises segue into the tactics that can make this cruel industry turn in your favor from you barely hitting 5 seconds to sound, there is something called player acquisition and it starts with painstaking abilities especially shoulder by a big fraction of what will be your first base of repeat customers.

How Much Do Nail Technicians Make?

Nail Technicians can make anything from nothing to thousands a month based upon the training they have, where they work and what services are being offered. Nail technicians, on the other hand have a median of about $27k per year if you are to believe the U. S. Bureau Of Labor Statistics Who says but Oh, what riches and how many top professionals in nail art surely earn much more than that!

Earning Potential Examples Now, allow me to illustrate this.

– Entry Level Nail Techs: If this is your first year in the industry, you should be earning $20 – 30K a year.

Senior Nail Technicians Professional nail technicians with a year of experience and an established client list can earn $40-60k per year.

Nail salon homeowners: A fiercely-competitive salon owner and entrepreneur currently has the flexibility to earn $100,000+ relying on their retail inventory.

Note: The above numbers are estimated and actual income maybe differ for the average individual due to his views, based on how many dedicated people want to settle in a professional field.

Services and Upselling Opportunities

So when it comes to maximizing your nail tech income – more is always better and every single read needs to be considered an opportunity for an upsell. Examples of services and tips how to listen on:

1. Manicures and Pedicures: These staple services will be the backbone of your business. Include specialty treatments like paraffin wax, hot stone therapy, baby foot and eco-friendly replacements.

2. Gel manicure and pedicure: Gel services are very popular, naturally because they last longer then regular nail polish, however that being said they also tend to cost quite a bit more.

3. Nail Art Design: Decorate your nails with creative nail art design skills (From basic patterns to 3D sculptures.) These Services Can Help You Increase Your Income Dramatically

4. Acrylic & Gel Extensions –Let us be honest, nail extension services are the most convenient ones which assure you repeated clients since they need several visits for maintenance and infill.

5. Spa Services: Consider providing massages, facials or body therapies for an all-encompassing relax program

One of the most profitable methods to make more money is by upselling Offer clients to-go retail products related to what you do (hand & foot treatments) (nail art that she can use herself at home).

Tools of the Trade: What Every Nail Tech Needs

Invest in good quality tools and products to shine as a nail technician. EachEssentials: A list of stuff I think every professional should have.

1. If you want to care of your nail, fillers and sanding block is essential for shaping & smooth nails with the least damage.

2. Cuticle Pushers and Cutters – Tools to Keep Your Cuticles Healthy | How to Prevent or Relieve Railroad Tracks

3. Toenail clippers and scissors: You will need good quality toenail clippers as together with a pair of fine-pointed sharp-end two-piece nail scissor a nail to shave the head.

4. While they differ slightly depending on the lamp, UV/LED lamps cure gel and acrylic nail products.

5. Nail Brushes + Dotting Tools — for more complex nail art designs.

6. Nail Supplies: Browse 100s of polishes, gels, acrylics & treatments from best selling pro manufactures.

Find ways to create a clean space that is comfortable to work in, proper ventilation where you are not inhaling any particles of sterilization chemicals even though they are safe for clients they still may not be the best option when it comes to your health.

How to Build a Clientele

Your loyal and devoted clientele is your bread and butter as a nail technician. Following are 5 strategies to ensure you get new and quality clients:

Tip #2: Provide excellent customer service—be personable and perform quality work You will separate yourself from everyone else by being the one who notices the little things and doing everything to perfection.

Create a style, which separates you from others, and become an expert in that style. Whether that would be a single type of nail art, all stamped nails or organic/vegan products within the industry.

Social Media Love: Use these platforms to promote your work, give tips and interact with potential clients on sites such as Instagram, Facebook and Tik Tok. It is true that social media is great for reaching people.

Implement Loyalty Programs : Implement a loyalty program or bonuses/referrals for customers to come back and refer friends/family.

Team Up with Other Professionals: Partner with a hair stylist, makeup artist, or photographer to offer dual services and expand your client base.

Remember: Beauty is the language of word-or-mouth. If you are providing a good and reliable service this often results in your happy clients writing positive reviews for you as well as referencing you to their friends which overtime stablishes a customer base.

Can Nail Techs Earn Six Figures?

Yes, it is definitely possible to make six figures as a nail tech but you’ll need to approach things thoughtfully with a lot of work upfront. What it takes to achieve this level of success, are the following 3 key factors:

Physical Location: Your geographical market (high-income area or a large metro city make your potential earning much higher, some local markets may not be able to sustain such years).

Specializing: by specializing in a unique offering, like detailed nail art or medical-grade pedicures, you can charge more for your services.

Business Ownership: Owning and operating your own nail salon or spa means you get to keep more of your profits and have more room for growth as a business.

Product Sales: Selling a handpicked range of retail can drive additional income for at-home nail care.

Education and certifications — Investing in further training or certifications can also justify premium pricing if it makes you an expert in your field.

Effective Time Management: By putting your procedures in place, you will be able to use more time on other productive things which may increase your general earnings.

Getting to a six-figure income as a nail technician is not easy, but with careful planning and execution it is absolutely possible.

If you are a business related to nail salon or spas, think about using professional photo editing services from clipping ace. clippingace.com to create ultimate that selling components. The graphics also make it easy for customers to attract you therefore overall their written work may help throughout the earning process of that which subsequently increases your viewer and benefits.

Conclusion

Successfully becoming a nail technician takes talent, creativity but also some dedication. Offer a wide array of services, upsell, buy quality equipment and build your clientele all lay the foundation for a profitable career path.

Making six-figures is easier said than done, but possible with the right work ethic, planning, and willingness to learn. There is no better time to learn nail art with so many challenges and opportunities ahead of you as an aspiring professional nail artist.

Studio portrait photography

Mastering the Art of Studio Portrait Photography

Essential Tips for Captivating Studio Sessions

Introduction to Studio Portrait Photography

Being a photographer who is very much into portraits, I have always got attracted by the art of taking splendid portraits in a studio environment. While studio portrait photography provides you with full control over the lighting, composition, and imagery, it also enables you to be in charge of the overall look of your images. Whether you’re a professional photographer or an amateur photographer aspiring to get better, the art of studio portrait photography is sure to bring your work to a whole new level.

Importance of Lighting in Studio Sessions

Lighting is an indispensable element in the process of studio portrait photography, which is responsible for the creation of magnetic and visually attractive images. A proper lighting setup might make the difference between a good and a great picture by creating the right atmosphere, showing the subject to its best, and helping you to accomplish your vision. Knowing various lighting techniques and setup is imperative for you to keep the studio sessions as you wish.

Among the most frequently applied lighting schemes in the studio portraiture is the three-point lighting framework. It is a three point light setup where the key light, fill light, and hair light are used simultaneously. The key light is the one that plays the role of the main light source which gives the main lighting to the subject. The fill light helps to soften shadows and even overall lighting, meanwhile the hair light subtly emphasizes the subject’s hair or shoulders, thus separating it from the background.

Essential Studio Lighting Setups for Portrait Photography

You can try out different studio lighting setups including some to create different moods and effects in your portraits. One of the frequent lighting schemes is called Rembrandt lighting, which was named after the celebrated Dutch painter. It is the per-side of the subject’s face to the key light that is positioned 45-degree angle, and the small triangle of light is created on the cheek opposite the light source. This brings a three-dimensional effect to the portrait and, as a result, the image of the subject becomes classic and timeless.

One more widespread kind of lighting set is called clamshell lighting. The configuration has a large softbox or umbrella right above the subject’s face, which serves as the main light source, and a reflector below, which helps to fill up any shadows. The gentle and soft light comes from above and creates an attractive and evenly lit portrait. The reflector helps to minimize the darker shadows as well as the under-eye circles.

Mastering Posing Techniques for Captivating Portraits

Studio portrait photography is built around posing. It may be a crucial factor that can be a make or break one in your photography. How you frame your models can tell a lot about their personality, draw people’s attention to their best sides and make the viewers feel connected to them. It is essential to make your subjects calm and relaxed during the session so that it is reflected in the way they express themselves and their body language.

First, get familiar with the fundamentals of posing, for example proportion of thirds and the role of body angles. Try out various poses and make your models feel free to show up their natural self. Pay attention to their facial expressions, the way they are holding their hands, and their body posture. Make sure you lead and manage your subjects through the session, asking them to follow simple instructions and give them feedback to get the best result.

Composition and Background Selection for Studio Portraits

The way you group and organize your studio portraits in the context of your images has a significant impact on the general visual appeal of your prints. The art of the portrait is in arranging the focus on the subject and creating a parallel between the subject and the frame. One of the key concepts in photography is the rule of thirds, leading lines, and negative space which you should employ to create a dynamic and visually appealing arrangement.

Background selection, in this case, should be aligned with your subject and should blend in so that it may enhance the mood you wish to convey. Simple backgrounds in solid colors are flexible and can be used in a myriad of portrait styles. As an alternative, you can play with textured or patterned backdrops to make your pictures more attractive and full. And most importantly, make sure the background is plain and not cluttered so that it does not distract the viewers from the main subject.

Camera Settings and Lens Selection for Studio Photography

To get professional studio images, it is therefore essential to master the camera settings that are optimal for the task and also the lens choice. Manual mode of shooting ensures full control of exposure, which allows you to set the aperture, shutter speed, and ISO that best fits the effect you are trying to achieve and the current lighting conditions. Opening up with an aperture between f/5.6 and f/8 will guarantee precise focus on the subject while obtaining a smooth background blur.

Regarding the choice of the lens, the one with a focal length of 50mm-85mm which is best for portrait photography is ideal for the studio photography. Such lenses naturally create a certain point of view and let you take flattering portraits without exaggeration. Try different focal lengths to get a feel for them and see what suits you best and which one will give you the desired composition of your pictures.

Creative Use of Props in Portrait Photography

Props can become an artful and yet unique part of your studio portraits. They are often used to tell a story, support the plot, or set a particular mood in the pictures you are taking. Props are a useful tool, and to use them effectively, you should select objects that are related to the subject of your portrait and don’t steal the spotlight from the main focus of your painting.

One instance is if you are shooting a musician, you can include musical instruments or music to give it more depth and context. If you are taking a family portrait, you could use props such as instruments, books, or sports equipment to highlight the whole family’s hobbies and interests. The thing is that you use props only if you need to and when you do they should be with a purpose, so they bring your image to the next level without turning into an obstacle.

Expressive Posing and Effective Direction and Communication with Subjects

By the means of creating a relaxed atmosphere at the moment of a photo-shoot, you can help your models to show themselves and be authentic. Help them go through poses that they feel are a reflection of their personality and which will make them feel comfortable and confident. Good direction and communication are key factors in creating a relaxed environment, where the students are equally active during the lesson.

Make sure you spend some time with your subjects first and then jump into shooting. Get into conversation, learn about their hobbies and likes, and pay attention to what they like and dislike. The cameraman should try to make them feel more comfortable, which will result in a more open response. Offer your participants the necessary instructions, and support them by giving positive encouragement and feedback. It is important to keep that in mind. The more comfortable and joyful a subject is, the more real and engaging the portrait will be.

Enhancing Studio Portraits with Reflectors and Diffusers

Reflectors and diffusers are useful tools in working with light in a studio setup that change its intensity and effect. Reflectors reflect the light back onto the subject, thereby help to fill in shadows and create a more balanced lighting setup. They are available in different colors and sizes which help you to control the intensity and color of the reflected light.

Contrastingly, with diffusers, you are able to soften and diffuse harsh light, and as a result, you will obtain a more flattering and natural portrait look. They can be used for adjusting the light coming from a window or studio strobes. It will help to get rid of harsh shadows and achieve a delicate look overall. Play around with different reflectors and diffusers to see what the right setup for mood and lighting effect in your studio portraits is.

Post-Processing Techniques for Stunning Studio Portraits

The post-processing is indeed a vital step in the studio portrait photography workflow. It lets you improve the color saturation, create the mood, and the overall visual appeal of your pictures making them better and more attractive. It is advisable for you to do the editing of your studio portraits in a way that brings out a natural and timeless look that improves the subjects’ features without looking too edited.

Begin by adjusting exposure, contrast, and white balance to render an image with a balanced quality. Adjust the colors and texture to have a homogenous feel. Focus on the details like skin retouching, removing distractions, etc. to bring more sharpness to the face. Make sure that the image remains authentic and not alter it too much in order to avoid a situation when the portrait appears unnatural.

Studio Portrait Photography Tips for Beginners

1. Try out different lightings and approaches to see their role in the last shot.

2. Try different poses and use the examples of skilled photographers as a source of inspiration.

3. Invest in good quality equipment that will include a stable camera, lenses, and lighting sets.

4. Give your subjects the time and space to develop a relationship with you and become comfortable with the camera around them.

5. Keep learning and improving your skills by attending workshops, online tutorials and by practicing manually.

Taking Professional Headshots in a Studio Setting

Headshots taken in studio are one of the most widely used images in business, they are found in corporate profiles, resumes, and social media platforms. To get the professional head shots, the main thing is to focus on the face of the subject, which will convey their features and the personality.

First, choose a plain and uncomplicated background, so that the subject stands out in the spotlight. Be aware of the lighting setup, trying to create a soft and flattering light, which would be without shadows and emphasize the subject’s best features. Help the employee to go through a range of postures and facial expressions, highlighting their self-confidence and businesslike manner. Do not forget to give clear directions and communication be effective all through the session.

Capturing Memorable Family Portraits in the Studio

Portraits of family members are priceless items that are used to preserve and reflect the love and connection between family members. In a studio environment you have the benefit to set up your own lighting, composition and overall image look. To make family portraits that are going to be cherished for a lifetime, it is essential to create a calm atmosphere and great mood for everyone present.

Promote natural interactions and authentic sentiments amongst the family members. Guide them through asanas that show their relationships and dynamics. Try composing various portraits, such as individual ones, group ones, and candid ones. Keep an eye on the lighting and background so that they match the family’s style and give it a unified appearance. The challenge is to create a story of a family that is real and timeless in a way that makes the viewer feel the love and connection between them.

Finally Embracing the Art of Studio Portrait Photography

Studio portrait photography is an art form that demands a lot from the photographer, including his/her technical skills, imagination and communication skills. If you learn and master the basic techniques and principles, you will be able to create portraits that will amaze everyone and will be full of feelings and stories. Whether you are a photographer by profession or just a hobbyist, explore the art of studio portraiture and discover the unique benefits you can gain. Continually study, try out and keep on innovating, your creativity is limitless. Through diligence and experience, you will surely be able to take wonderful portraits that will be remembered for years to come.

If you’re up for the next step in studio portrait photography, start with some trial and error using different lighting and posing techniques. Communicate efficiently and provide proper instructions with your subjects and don’t be shy to experiment with different creative ideas. Never forget that perfection takes time and experience. Therefore, do not stop learning and practicing your skills until you become the master of your art. Happy shooting!

Marketing Strategies for Photography Studios

Marketing Strategies for Photography Studios

Attracting Clients with a Professional Photographer Near You

Introduction to Marketing Strategies for Photography Studios

As a professional photographer, I have realized that marketing technique is a critical element in the process of attracting customers to the photography studio. In the job market of today, being able to show your competitiveness and the breadth of your skills is the key to getting hired. This article aims to assist you in developing the core components of an effective marketing strategy for photography, which will be useful in finding clients with a professional photographer nearby.

Importance of Attracting Clients with a Professional Photographer Near You

Customers typically have more confidence in hiring a local photographer who is in the same proximity as they are. There is the convenience and the sense of trust that comes in when they know they can easily access you and you are there to have face-to-face interactions. By choosing the professional photographer label which is near your target clients, you can exploit the search for proximity and build up a strong clientele.

Understanding the Needs of Different Photography Clients

In order to attract clients, it is essential to understand what these people expect and how they prefer to get their desires met. There are many different photography clients. Some might want wedding photography, family photography, newborn photography, portraits or headshots, and real estate photography. Spend some time for niche research and comprehend what is needed in each. This will help you to focus on your marketing and to convince the audience in the areas which are important to them.

Key Elements of a Successful Photography Marketing Strategy

The key elements of a photography marketing strategy are the following, success being a result of their combination. First and foremost, to look professional, you should have an aesthetically pleasing website that is easy for your clients to navigate. Invest in a professional website design and see to it that your site is optimized for search engines to help your clients get you when they search for a photographer within their area of your business.

The second thing you should consider is to make use of the online platforms fully. Make accounts on social media on platforms like Instagram, Facebook and Pinterest for displaying your work and engaging with your audience. By providing high-quality content on a regular basis that is reflective of your style and knowledge, you will be able to establish yourself as an authority in the field.

Utilizing Online Platforms to Showcase Your Photo Studio

Website platforms are very useful when exhibiting your photography studio. Your website portfolio has to be visually appealing and easy to use, the one that will highlight your best work. Include wedding, family, newborn, headshots, and real estate photography into your portfolio to show your range of skills.

Besides your website, Instagram, an incredibly powerful social media platform, is another place to show off your work. Keep your accounts active by uploading new and exciting pictures with compelling captions on a regular basis. Make your posts searchable using hashtags to connect with a broader audience and communicate with potential clients. In this regard, you will be able to attract those clients who look for a photographer near them by sharing your work regularly.

Effective Ways to Promote Professional Photography Services

Successful marketing of your professional photography services means you have to adopt a multi-directional approach. Also, use social media and online platforms but don’t neglect other marketing strategies, as well. Attend local events and network with others to extend your professional network. Give photography for charity events or team up with local businesses for displaying your photography.

Word of mouth in photography is a very strong marketing tool as well. Encourage your happy customers to share their positive experiences with friends and other family members and direct them to your studio. Offer incentives, for example, discounts or free prints, to your customers who refer others to your business. Through giving out excellent services and continuously delivering good photos, you can earn a reputable name and get more clients through referrals.

Targeting Specific Niches – Wedding Photography, Family Photography, Newborn Photography, Headshots, Real Estate Photography

Identification and focusing on particular niches within the photography industry can be a key factor in helping you to stand out and gain clients who are in need of your specific expertise. Wedding photography, family photography, newborn photography, headshots and real estate photography are the niches with different audiences but are quite profitable.

One of the areas that should be focused on is the niche market. This will require you to adjust your marketing strategies to suit the market. As an illustration, if you are offering wedding photography, develop a section on your website that will feature your wedding portfolio. Link up with wedding planners and bridal shops to build up partnerships and gain referrals. Knowing the specific needs and wants of niche markets will allow you to become the best photographer in your region.

Tips for Creating Captivating and Compelling Photography Portfolios

Your portfolio is your ultimate marketing tool. To captivate the attention of potential clients, it is vital to compile a portfolio that is not only eye-catching but also compelling, which will demonstrate your talent and individuality. Here are a few tips to create an outstanding photography portfolio:

1. Select your best work: Be ruthless and only display your best images. Quantity is over quality.

2. Show variety: Showcase a wide variety of photos that exhibit your ability to take pictures that fit every genre.

3. Tell a story: Put your portfolio in an order that has a flow and presents a compelling story. This will keep clients interested and they will want to keep browsing through your work.

4. Update regularly: Make sure your portfolio is updated by inserting the latest work and deleting obsolete photos. This reveals that you are a photographer who is always on the move and is always striving to new heights.

Following the offered guidelines, you may produce a photography portfolio that will remain in the minds of the potential clients and will help you stand out among your competitors.

Collaborating with Other Professionals in the Industry

Working with other professionals in the photographic world can bring you a lot of new offers and help you reach a broader audience. Think of involving wedding planners, makeup artists, or event venues by offering joints packages or cross promoting their services. You will have the ability to tap into each other’s networks and expertise, which will help you attract clients who are searching for a complete photography experience.

Besides that, you may also engage in collaboration with other photographers in your locality. These can be in the form of organizing photography workshops or taking part in a joint exhibition. Besides, this will help you to expand your network and knowledge and, at the same time, prove your dedication to the industry and place you on the list of respected professionals.

Utilizing Social Media and Online Marketing Tools for Photography Studios

Social media and the online marketing tools play a significant role in the photography studio’s success. Tap into the power of Instagram, Facebook, and Pinterest to engage with your audience and shine your work.

1. Engage with your audience: Respond to comments, messages, and inquiries within a reasonable time and in a professional tone. Make a sincere effort to connect with your audience and develop relationships.

2. Run contests and giveaways: Organize free sessions or prints as prizes that are meant to ignite excitement and engagement on your social media platforms.

3. Collaborate with influencers: Work with influencers or local bloggers that share your brand philosophy to connect with their followers and get more exposure.

4. Invest in targeted advertising: Use the ad targeting capabilities on social media platforms to reach a specific age group or location. This makes sure that your marketing will be well targeted.

Measuring and Analyzing the Success of Your Marketing Efforts

In order to make sure that you have a marketing strategy that works, it is extremely important to measure and analyze the success of the chosen strategies. Set straightforward goals and key performance indicators (KPIs) for every single campaign or marketing action. Leverage the resources such as Google Analytics to measure website traffic, engagement and conversions. Measure your metrics on social media, such as reach, engagement, and follower growth.

Frequently check and analyze the data to see what is going on and where the improvements are needed. Tweak your marketing strategies in the way you find optimal to achieve the goals that you have set. Through regular assessments of the effectiveness of your marketing activities, you can tell what works and what doesn’t and get more customers to your photo studio.

Conclusion: Taking Your Photography Studio to the Next Level

In general, marketing strategy is a must for the client attraction to your photography studio. Through the knowledge of the requirements of different photography clients, online marketing, aiming at niche markets and partnering with other professionals you can successfully run your photography business. Social media and online marketing tool are very effective resources that need to be fully exploited. Bear in mind that you must constantly measure and assess the effectiveness of your marketing strategies to fine-tune them. These strategies that I have proposed will assist you to raise your photography studio to a higher level and attract clients with the help of a professional photographer who is nearby.

Group 1412

Best Way to Color Correct in Photoshop

Understanding Color Correction in Photoshop

Adobe Photoshop’s color correction is a vital step for photographers, designers, and digital artists as well. It entails modifying the colors of your image to make them more precise and nicer looking. This is the most important step that assures the colors in your pictures or designs natural match with reality or your creative vision. Whether it is a picture that looks too blue, because it was taken under the shade, or a design that needs to have more vibrant colors to live, understanding how to color correct in Photoshop is important.

The underlying theme of color correction is about bringing everything in balance and in harmony. Harmony in colors is achieved when they reflect the prevailing mood, emphasize composition and convey the correct message. It’s not just about creating an image that looks “as it is”— in some cases, the aim is to artificially change colors to get a particular effect. Regardless of which goal is the main one, the technique requires a sharp vision and a very broad knowledge of color theory.

In the beginning of my color correction journey, I was totally submerged in the ocean of tools and opportunities of Photoshop. Nevertheless, the more I study and try, I start to have a deep appreciation for this art form. It is a combo of scientific competence and artistic instinct where a small change can have a great effect on whole result of your work.


The Importance of Color Correction

Color correction is a tool to help achieve multiple goals and its value should not be underestimated. The first and most important thing is that it provides uniformity across different devices and media. What is perfect on your camera’s display often turns out to be unacceptable on your desktop monitor and a disaster when printed. Color correction does the job of accentuating colors to make them look the best on any platform.

Also, color correction can bring a certain charm to an image. It can make a picture, that would have otherwise been dull and lifeless, into an exciting and eye-catching one, which one can’t help but look at. This revolution not only offers the opportunity to artistic endeavors but is also the key element of successful projects as visual presentation may turn out to be either a breakthrough or a failure.

Finally, color correction is the skill that gives a chance to be an artist. This is something that can be a tool, if used properly, to showcase a particular view to people. It is not just about error correction but about improving and perfecting to make the viewer feel the intended emotion or to create a visual impact.

Common Color Issues and How to Fix Them

In the labyrinth of color correction in Photoshop, which I am now familiar with, I encountered many different color issues that are common. Another popular issue is color cast which causes the whole image to be tinted in an unwanted way. This is usually a result of inadequate white balance settings when filming the video. The solution here is to pinpoint the color cast in the photo and neutralize it with the help of Photoshop’s color balance or selective color adjustments.

Another point that frequently arises is of an overexposure or an underexposure. On the other hand, colors which are excessively bright are also as unsuitable as those that are too lackluster. Tweaking the saturation levels is a way to solve this problem and make sure that color is balanced and reflects the reality.

Moreover, contrast problems also normally occur along with color issues. A lifeless effect is the result of an image with flat contrast, even if the precise colors are true to reality. On the other hand, similarity of contrast may cause the image to have insufficient detail in the shadow areas and the highlights. Using curves or levels adjustments in Photoshop can help correct contrast while maintaining color fidelity.

Tools and Techniques for Color Correction in Photoshop

Photoshop provides the necessary tools and methods for color correction that an artist need. The Levels tool, for instance, is vital for the purpose of adjusting the brightness and contrast of an image in photographic processing. Change the input levels to change the mood and detail of your photograph significantly. In the same way the Curves tool gives a lot of flexibility to make perfect adjustments to the tonal range and color balance.

The Color Balance tool is the other main tool that the color corrector uses to correct the color of the media. This feature allows you to calibrate the colors of your image, whether it is to make it warmer or cooler to eliminate any unwanted color casts. Moreover, the Vibrance and Saturation adjustments help in setting the level of colors by not letting them be overly, or washed out.

Selective Color tool is the one for making articulate changes as it helps you to adjust a single color without impacting other parts of the image. This is a very useful tool for correcting any color problems specifically and for the creative color grading.

Step-by-Step Guide to Color Correcting in Photoshop

To start color correction in photoshop might seem frightening at beginning. But the methodical approach let you break down the process into smaller and manageable steps. Here’s a step-by-step guide to color correcting an image:
1. Evaluate Your Image: Initially, look carefully at the colors in your picture. Find color casts, too saturated or low contrast issues and problem solve.
2. Start with Levels or Curves: Play around with overall contrast and tonality of the image by applying Levels or Curves. This is one of the most basic steps that might help in correcting many color issues that are just appear.
3. Correct Color Casts: Color Cast of your image can be removed with the aid of Color Balance feature. By setting the sliders of shadows, midtones, and highlights, you will get rid of the shadows.
4. Adjust Saturation: Adjust the Vibrance and Saturation settings to finely tune the degree of color munition. Be careful not to overdo it which means colors that are bright and natural are a good choice.
5. Refine with Selective Color: For more exact color change, then you should use the Selective Color tool. This feature enables the visual adjustment of each and every color so that they blend into a perfect harmony.
6. Final Touches: Evaluate your image with a severe attitude. Then you can finish up any final changes to ensure the colors are what you’ve been thinking all along.Remember, subtlety is key.

Color Correction Tips and Tricks

Through years of practicing, I have developed a rich knowledge of how to correct colors in Photoshop. Adjustment layers proved to be game-changer as I learnt to use them for all my edits. This is a non-destructive way of manipulating an image that allows for endless redrawing and refining without compromising the original image. Yet another idea you could try is to make a habit of taking some time off your work for a few minutes every now and then. Coming back after a long break, you frequently notice the color imbalance that was not visible before.

Furthermore, the color correction options that are automatically provided by Photoshop can be used as a guide for your modifications. Sometimes not flawless, they can lead you to the point where you need to be faster and easier.

Advanced Color Correction Techniques in Photoshop

The more experienced colorists can further their knowledge with sophisticated color correction methods. An example of this technique is color grading which additionally to correction also allows change the color scheme of an image in a style. This technique is usually employed in movies after their production, but it can also be employed in any photo to increase its overall drama.

This is yet another professional technique that involves using the Lab color mode for color correction. This method makes it possible to separate white from color and thus to perform very subtle adjustments in color and contrast without affecting each other.

Using Adjustment Layers for Precise Color Correction

Adjustment layers form the basis of non-destructive editing in Adobe Photoshop. They grant you an ability to apply color corrections without damaging the original photograph. This flexibility is precious, with you can test out various changes and even easily revert back if you find it necessary.

For the purpose of accurate color correction, I am in most cases relying on the stack of multiple adjustment layers, each of them being responsible for a particular kind of flaw. Take for example, a layer used in color casting correction and another used in saturation only for the blues and greens. This approach allows the doctor to adapt the adjustments to the needs of the patient and in a controlled manner.

Color Correction Plugins and Presets for Photoshop

The in-built Photoshop tools are impressive, but sometimes they are not enough and more support is required. And that is when plugins and presets show their magic. These third-party tools are a great time-saver, as they offer per-configured settings or advanced algorithms that can automate complex functions. The options are limitless, from an instant solution to a special effect that you’ve been eyeing for quite some time now, there’s probably a plugin or a preset that is made just for you.

Although this is so, it’s crucial not to be overly dependent on them. They should be your tools to become better, and not the reasons why you don’t have to improve. A deep mastery of color correction basics will be your most precious asset forever.

Conclusion: Mastering Color Correction in Photoshop

Color correction in Photoshop is a process which is an endless road of development and practice. It takes in that respect, the patience, attentiveness to details, and a mastery of color theory. However, the ultimate outputs are the ones that bring the greatest satisfaction. Among others your competence will be developed with each image you create with color correction. Eventually, you will be able to express your ideas through your work.

Keep in mind that the most efficient way of color correcting in Photoshop is by using a combination of different methods. The best option is the one that suits you and your images and allows you to reach the desired effect. Chance, explore and don’t be scared of breaking the rules. Through the process of time and practice, you will be able to create a color correction workflow that will serve to enhance all your photography and design endeavors.

Finally, I will summarize our article stating that you should go ahead and experience what you have learned by using Photoshop. Whether you need to color correct a landscape photo or design a vibrant poster, these tools and techniques are going to be your foundation. Hence, you will start understanding it better. Happy editing!

mirrorless camera for concert photography

Are mirrorless cameras better for concert photography?

Concert photography is a dynamic and challenging field, which consists of the vigor of live performances as well as the art of photography. Catching the very soul of a concert from the passion of the artists to the thrill in the audience makes it not just a matter of techniques and timing, but also of equipment. In this mission, the camera selection can be the key factor that can greatly affect the visual quality and effect of the final pictures. This article explores the dispute about which technology, the mirrorless or the DSLR, is better for concert photography, offering tips that can be utilized by both the newcomers and the experienced photographers when they are selecting the equipment for the concert photography.


Introduction to concert photography

Concert photography is much more than shooting pictures at music concerts. It is about the fact that it is the moments that slip away, the ones that really resemble the soul of the concert, that are the most important ones. The multitude of obstacles includes slow shutter speeds, quick moving subjects and unpredictable live performances which will test the skills of every photographer and their equipment. It is a fast-paced field that needs swift reflexes, good grasp of photography rules, and, most importantly, a camera that can go at the pace.

The necessity of carefully selecting a camera for concert photography can not be downplayed. By applying the technique that is most appropriate for the concert photography, photographers can overcome the most common challenges, including low light condition and fast action. Furthermore, camera type has a huge impact on the creative aspects of the photographer’s work; from capturing sharp pictures of dancers in motion to blurring backgrounds to create the subject of the photograph.


The importance of choosing the right camera for concert photography

The selection of a good camera for concert photography is a key factor that can change or improve the quality of your photography. Besides, the camera will be required not only to perform well in dim conditions but also to be capable of catching fast-moving action with no loss. Moreover, it should be very customizable and allow for quick control to be able to modify settings on the go, following the changes of the light conditions at the concert venue.

The comparison between mirrorless and DSLR cameras as the primary tools for concert photography still rages on, with each type of camera having its own specific pluses and minuses. Being aware of these differences is a must for photographers to make a smart choice that will work best for them, their personal style and the problems that they will have to face during concert photography.

Understanding the differences between mirrorless and DSLR cameras

The mirrorless and DSLR cameras have different fundamental components and features that bring them to life. DSLR (Digital Single-Lens Reflex) cameras are equipped with a mirror system that enables the light coming from the lens to be projected to the optical viewfinder. The moment the release button is pressed, the mirror moves up, the shutter opens and the light creates the image which is then sensed by the image sensor. In other words, mirrorless cameras do not have a mechanism with a mirror, which is the case with DSLR cameras. Instead of the light being transmitted to the mirror where it is then reflected to the image sensor, light passes directly through the lens to the image sensor, which displays the image on either the electronic viewfinder or the rear LCD screen.

This primary difference is the reason why mirrorless cameras excel in operational aspects. They are smaller and lighter than DSLRs, that is why they are easier to carry and handle. Also, it is an important advantage during long concert performances. Moreover, mirrorless cameras can take pictures in a quieter way compared with the mirror mechanism, and it is necessary to have this feature when shooting in live performance environments where noise can be a distraction.


Advantages of using mirrorless cameras for concert photography

Mirrorless cameras are characterized by several unique benefits compared to the traditional cameras for concert shooting. The first and foremost, the electronic viewfinder (EVF) of the mirrorless camera offers a real-time preview of the image with the current exposure settings that can be a blessing for the photographers in the fast changing light condition of the concerts. Instant feedback enables photographers to make changes as they go but they are still able to focus on the action since they don’t need to take their eyes off it.

The other considerable benefit is a mirrorless cameras’ autofocus ability. For mirrorless models of the present age, an autofocus system, which is very fast and accurate, with a feature of eye-tracking is very useful in capturing sharp images of performers in motion. Moreover, mirrorless cameras usually have high frame rates for continuous shooting which exceed that of DSLRs, giving the photographers the chance to shoot fast moving moments and expressions with more ease.


Disadvantages of using mirrorless cameras for concert photography

While there are the advantages of mirrorless cameras in concert photography, there are also some drawbacks that come with this type of instrument. The battery life may be a considerable issue because the electronic viewfinders and LCD screens are used continuously, thus the batteries can drain faster than in the case for DSLRs. This difficulty can be encountered during extended concerts or festivals where the probability of charging stations may be low.

The last point is the capability of the electronic viewfinder to operate efficiently in low light conditions. However, even though EVFs have evolved a lot, some models might still show a grainy and laggy view in dark areas that can reduce the photographer’s speed of composing shots and thus, making them less accurate. Moreover, the lens and accessory variety for mirrorless cameras, although it is growing fast, is still, in comparison to the really vast selection for DSLRs, limited.

Best mirrorless cameras for concert photography

Among mirrorless cameras, there are few that can easily be classified as particularly good for concert photography. As an example, the Sony A7 III is a good choice for concert photographers who require an amazing low-light performance, fast autofocus, and high-resolution electronic viewfinder. The X-T4 model from Fujifilm is also a great option, as it has a high shooting speed, superior image quality and excellent lens selection which are all suited for concert photography.

The Canon EOS R5 is another good alternative, having a high-end autofocus system, high-resolution sensor, and a great stabilization feature, hence an instrument for taking sharp and detailed concert photos. These cameras are just a few examples of mirrorless technology advances that benefit concert photography, as they manage to be portable and take good quality images under low light conditions.


Tips for capturing great concert photos with a mirrorless camera

In order to fully utilise mirrorless camera in concert photography, you need to get comfortable with the features and settings. Using different autofocus modes will narrow down the most suitable method for following moving objects under different lighting conditions. The endless shooting mode enables you to get a variety of action sequences captured. This increases the chance of getting the perfect shot.

To know how concert lighting affects exposure and how to handle it is also very important. The ability of mirrorless cameras to have a wide range of exposure is something that can be used to capture details in both shadows and highlights, but this requires the proper exposure settings. Besides, the money spent on high-speed lenses with large apertures is worth it because they improve your camera’s capacity to operate in the low light conditions, and this makes the shutter speeds faster without the need to increase the ISO, which can lead to noise.


How to avoid clipping in concert photography

Clipping, which means that the brightest or the darkest parts of an image get lost, is one of the main issues of concert photography as a result of the extreme lighting conditions. To keep clipping away, it is necessary to watch the histogram on your mirrorless camera, which gives a real-time graphical view of the tonal range of your picture. Fine-tuning the exposure settings as per the histogram is crucial because it ensures that the highlights and shadows are not lost.

Shooting in RAW is a good way to capture a wider dynamic range than JPEG. The process of post-processing becomes easier and more efficient. Besides that, doing exposure bracketing, where you take different exposures of the same scene with different exposures, can be a helpful technique for you to make sure that you have captured all the lights of the scene.


Using post-processing techniques to enhance concert photos

Post-processing is the last but not the least important stage in concert photography. It’s necessary to extract all the beauty from your shots. The RAW data off mirrorless cameras have a lot of information that can be edited further using post-processing software to rectify the exposure, increase the color saturation, and reduce the noise. Tools like noise reduction can be very useful, especially for images shot at high ISO levels, which helps to keep the image quality.

Balancing the white balance becomes essential as the ever-changing and dynamic lighting at concerts can give rise to unnatural color casts in photos. This process gives you the option to correct these colors, providing natural-looking skin colors and lighting effects. Last but not least, sharpening and clarity adjustments will help you to express details and textures, so that your concert photos will be outstanding.


Conclusion: Is a mirrorless camera the best choice for concert photography?

Without a doubt, the development of the mirrorless cameras has made them to be amongst the first preference compared to others due to the fact that they are both viable and, in some way, better for concert photography. Their small size, fast and precise autofocus systems, and higher-quality pictures in low-light conditions are overwhelming advantages over other cameras. Nevertheless, the dilemma between a mirrorless and a DSLR camera finally boils down to personal likings, individual requirements and the specific complications that come along with every concert environment.

Mirrorless cameras are not perfect either as the feel the issues like lower battery life, and incompatibility of some models with a slim range of lenses. Nevertheless, the verges of these benefits are thin, and concert photographers face quite a lot of limitations. As technology advances, these cameras are gaining more and more capabilities which is a wonderful thing. features and capabilities that cater to the demanding needs of concert photography.

For those contemplating diving into concert photography or looking to upgrade their equipment, considering a mirrorless camera is wise. Its blend of performance, portability, and innovative features make it a powerful tool in capturing the energy and excitement of live music performances. As with any photography niche, mastering concert photography takes practice and experimentation. A mirrorless camera could well be your partner in this creative journey, helping you capture those unforgettable moments on stage with clarity, depth, and emotion.

studio space optimized

Streamlining Studio Success: Optimizing Your Space for Better Workflow and Efficiency

As a creative industry professional, I know how much of a difference a studio space optimized for productivity can make. A streamlined studio not only optimizes production speed but also encourages the creativity and productivity of the workers. This article will explain how you can arrange your studio, how you can organize your space, and what ergonomic design principles you should use to achieve a comfortable and efficient working environment. From equipment configuration to sound treatment, lighting optimization to workflow streamlining, I will give you the tips and tactics that will help you to work more efficiently in your studio. With that, let’s get started and turn your studio into a hot spot of ideas and excellence.

Understanding Workflow Efficiency in a Studio Setting

Before we go further on the understanding of studio optimization, workflow efficiency should be known. Workflow efficiency means smoothing out and coordinating the tasks and activities in your studio, it starts with your entrance and ends with the completion of a project. The well-designed workflow helps you work efficiently and minimize the irrelevant steps and steps that don’t increase your productivity.

Analyzing Your Current Studio Layout and Workflow

To improve your studio space, firstly, look at your current setup from a different viewpoint and see your workflow. Take a deep breath and watch yourself circulate in your studio space, and you will find out which areas are congested and which ones are not used to their full potential. Such an analysis will help you find the places where you have room for improvement and develop your decision-making process in the subsequent steps.

Creating Functional Zones for Different Tasks

An actionable way to maximize your studio space is through the creation of functional areas for different projects. Use your studio space to set aside designated areas for recording, editing, mixing, and storage. This division in the business is all about having a distinct separation of duties and makes sure that all the departments have the required tools and equipment. When having designated areas, you’ll be able to reduce the interruptions and raise your level of concentration, resulting in better workflow productivity.

Ergonomic Design Principles for a Comfortable and Productive Space

Ergonomic design is of utmost importance since it will help you work in a comfortable and efficient manner. Do not forget to check the height and position of your desk, seat and equipment to minimize the risk of musculoskeletal disorders and maintain proper body posture. Invest in ergonomic furniture and accessories such as adjustable chairs, screen risers and keyboard trays. Besides that, you need an effective cable management solution to keep the room clean and tidy.

Efficient Equipment Arrangement and Storage Solutions

Proper organization of studio equipment and storage solutions are primary features of successful studio. Organize your things per usage frequency, and you would be able to have the most used items within the reach. Use shelves, racks, and storage cabinets to store your items so that your studio stays tidy and clutter-free. Think about an easier-to-spot labeling system to point at cables, adapters, and other small things. By having an equipment arrangement system that is well-organized and storage system that is well-decorated, you can conserve a lot of time and keep your studio clean.

Optimizing Lighting for Better Visibility and Mood

That’s why lighting is such a key element in studio optimization. Proper lighting not only makes your space brighter, but it also influences the mood and atmosphere. Choose a mix of natural and artificial light to create a harmonious and comfortable ambience. List Position your workstation close to a window in order to have access to natural light sources, and when you need more light for specific tasks, you can always use task lighting. To set up different moods and change the lighting intensity according to your needs, apply dimmable lights. The lighting is your studio is a key element in your comfort, productivity, and working environment so you should optimize it and reduce eye strain, boost productivity, and create a pleasant working atmosphere.

Acoustic Treatment for Improved Sound Quality and Focus

Acoustic treatment is a must for any studio, and you might need it especially if you are working with audio recordings. Proper soundproofing and acoustic treatment that is properly installed can guarantee optimal sound quality and help prevent interference from external noise. As for acoustic panels, bass traps, and diffusers, they should be considered for the purpose of eliminating reflections and reverberations in your studio. Choose wisely the position of the speakers and the microphones to get the best sound capture and monitoring. One of the methods that we will utilize to improve the listening experience is to create a designated area with acoustic treatment. resulting in improved workflow efficiency.

Streamlining Workflow and Traffic Flow in the Studio

To complement the workflow of your studio, contemplate the traffic flow within your studio. To ensure that the path is logically and efficiently designed, which allows one area to easily access another area, movements and interruptions can be reduced. Arrange your tools and pieces of furniture so that the place is easy to navigate and accessible. Have the most used things close to you and be on the alert for anything that can impede your movements. Through the best traffic management in your studio, you can save time, reduce the level of fatigue and maintain an orderly process.

Incorporating Multi-Purpose Areas for Versatility in Studio Usage

Forming multi-functional areas within your studio will provide you with a workspace that is both adaptive and flexible. Create a flexible layout, so that you could have an area that can be used for different activities, e.g. brainstorming sessions, client meetings and even relaxation. To mention, choose the movable furniture and modular storage systems that can be easily modified and adapted for the purpose. Through multi-purpose function, you can easily adapt to different projects and activities. Thus, innovation and teamwork are encouraged.

Creating a Creative and Inspirational Environment

A creative and incomparable atmosphere is a necessary condition for any studio. Make yourself a reserved place where you can place artwork, motivational quotes, and personal mementos which help you to stay positive and inspired. Opt for a vibrant color palette that inspires your thinking and helps you visualize. Use plants and nature to make your studio come alive and have a fresh feeling. Making a room for yourself that motivates and inspires your creative process is the key to getting you in a more productive mood and making the best out of your studio experience.

Flexibility in Design for Future Adaptability

In case of the studio optimization one should keep in mind the future development as well. Design your space with flexibility as your priority. This way, it will be easy to do some modifications or expansion if your needs will change. Equip your office with furniture and equipment that can be readily rearranged or updated. By adopting the modular design principle and being able to add or remove elements, if necessary. Designing with flexibility is the key to building a studio that can adapt to any new technologies and workflows. It can be a future-proof studio.

Utilizing Space Effectively for Maximum Productivity

Efficient utilization of available spaces is one of the key elements in studio optimization. Take advantage of every inch in your studio and make the most of it by buying vertical items and by making sure that you have storage solutions that maximize the storage capacity. Let’s think of wall-mounted shelves, overhead storage, and under-desk organizers. Make use of the space over and under the workstation to accommodate the equipment and other materials. An efficient use of space saves you from the headache of mess, clutter, and disorganization and helps you to work efficiently.

Conducting a Workflow Analysis and Making Necessary Adjustments

Carry out the workflow analysis in your studio from time to time and identify the possible bottlenecks or inefficiencies. Employ the following steps: watch yourself operate, note your processes, and ask for opinions from other users of the space. On the basis of the results, do whatever is needed to change your arrangement, equipment placement, and workflow procedures. Continuously analyzing and adjusting your workflow to optimize it is the key to a studio that is always at its peak.

Integrating Technology for a Seamless Workflow

Technology integration matters in modern times, since it is needed for the smooth running of the workflow in the digital age. Invest in the tools and software that will help you to do your work at a faster pace and automate the repetitive tasks. Leverage digital project management systems, cloud storage, and collaborative platforms to boost communication and coordination between projects. Make use of your equipment and devices to create a connected and efficient space for your studio. Taking advantage of technology gives you a chance to streamline your operations, reduce costs, and boost output.

Designing Collaboration Spaces for Enhanced Creativity and Teamwork

Collaboration in many cases can be one of the key elements of any creative endeavor. Set up labs where the students can interact and share ideas in your studio to enhance collaboration and creativity. Provide comfortable seating areas, round tables, or brainstorming walls that will contribute to the flow of ideas. They can be shared and developed on the spot. Ensure the use of technology that enables virtual collaboration and remote meetings. Space design which would facilitate creativity, communication, and teamwork is what you offer to your studio.

Creating Surroundings That Inspire and Motivate

The ambiance of your studio has a significant effect on your creativity and turning up. Select art, decor, and furniture pieces that match your personal taste and correspond to your creative image. Be the one who is surrounded by things and pictures that do the inspiring and that are your interests. Think about using music or ambient sounds that support you in your engagement and concentration. By managing what you see, you can establish your own one-of-a-kind and motivating art space that will ignite your creativity.

Minimizing Distractions for Better Focus and Concentration

The distractions may be the real culprits if the workflow is not running as expected. Locate your studio’s distracting elements and take measures to cut them down or completely get rid of them. Try to stay in a clean and uncluttered studio as visual interference can be distracting. Avoid the uncontrolled noises with noise-cancelling headphones or sound-proofing actions. Clearly define the limits and let others know that you need uninterrupted work time to be productive. Less distractors let you concentrate better and so be more productive at work.

Finalizing Your Optimized Studio Design

After implementing the optimization strategies, you have to spend some time and evaluate your studio. Then you have to refine and adjust it. Test the workflow, look at the internal workings of every single area, and make any necessary fixes or additions. Ask for feedback from your co-workers or other experts in the field to gain the information you need and to have a new viewpoint. Through the completion of your studio design that is optimized, you are able to verify that it really takes care of your needs and does not create a workflow bottleneck.

Conclusion

In short, optimizing your studio space is the key to delivering better workflow efficiency and higher success. Through studying your present layout, setting functional zones, applying ergonomic design principles, and using efficient equipment arrangement and storage solutions, you can remake your practice into a resourceful and comfortable environment. Moreover, the appropriate lighting, acoustic treatment, workflow, and traffic flow as well as technology integration and collaborative space design would also build the efficiency and creativity of your studio. A creative space should be designed in a way that is both inspiring and minimizes distractions as well as using space effectively so that it can help you achieve your creative goals. Hence, the first step of this studio success optimization is to incorporate the above strategies and get ready to experience a more organized and pleasurable studio life.